Monday, July 28, 2014

Yellow soup..what is in it?

This time we are starting with the final result, the soup. 

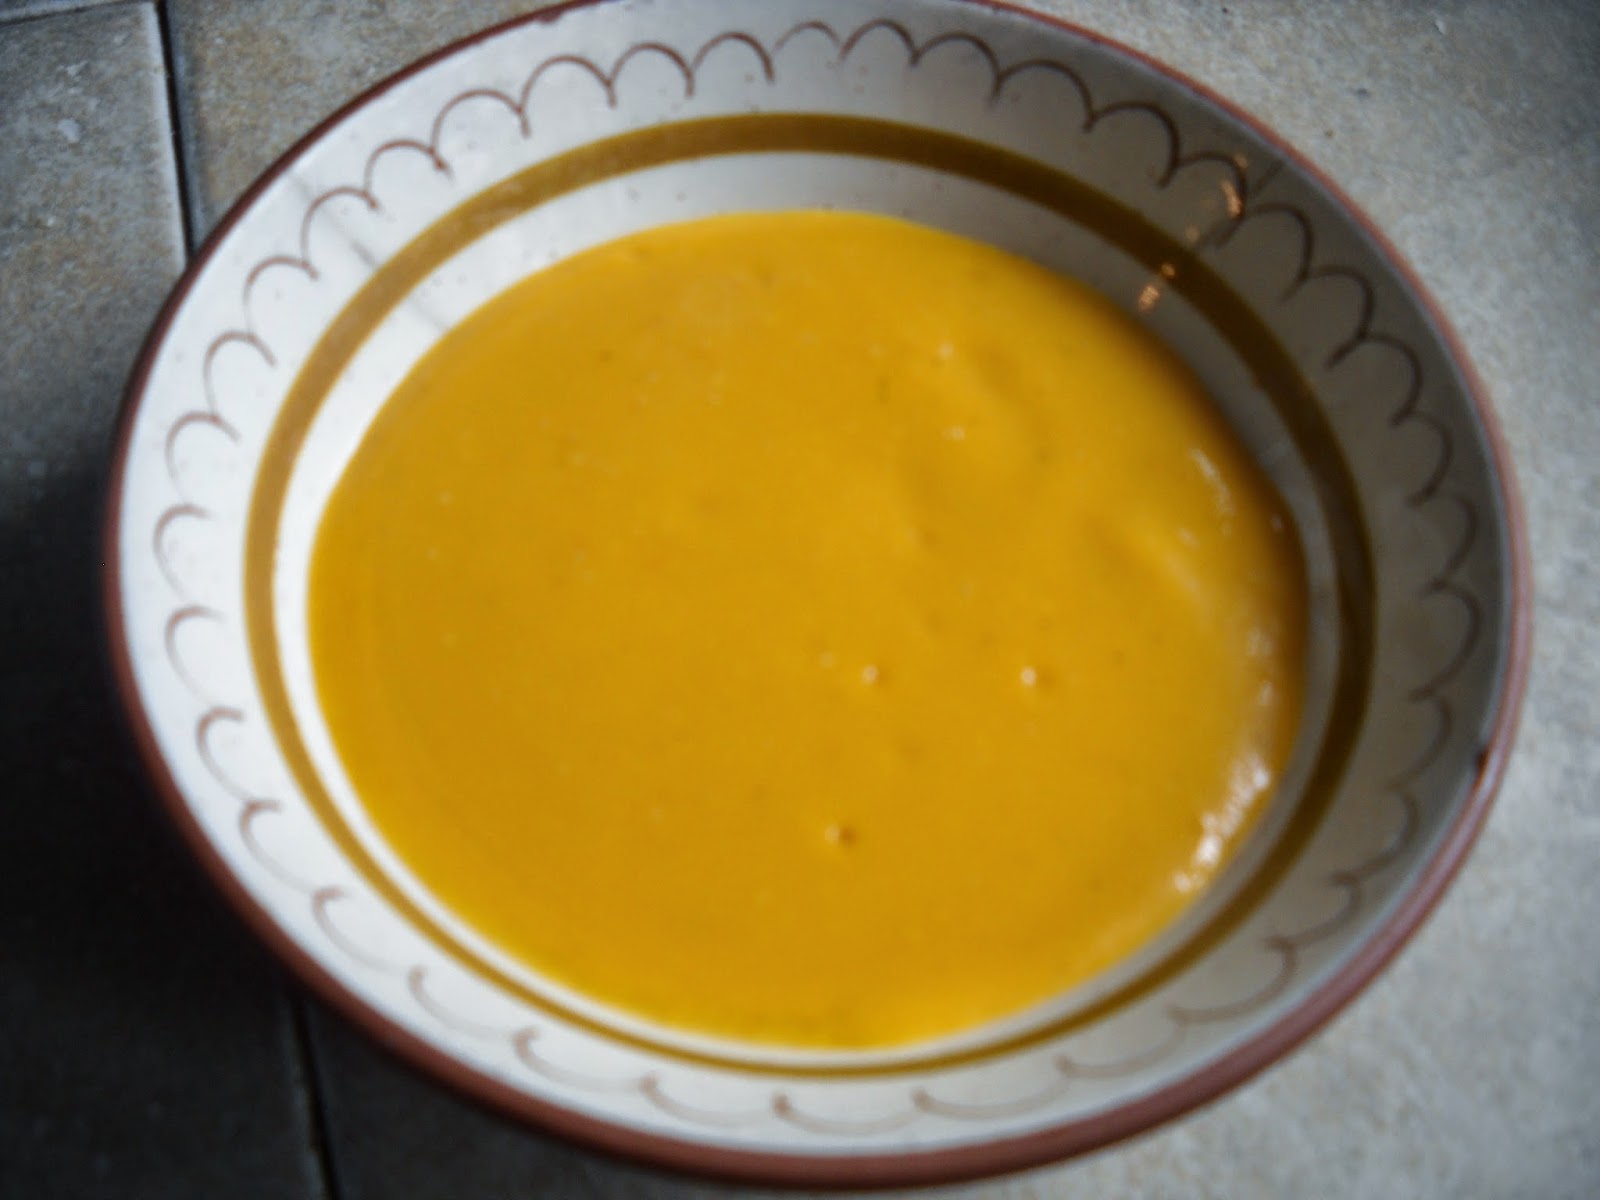
It's not butternut squash, carrot or any other yellow root vegetables you might think of.
It is tomato soup made with Sun Gold tomatoes!

The Sun Gold plants have produced an incredible amount of tomatoes this year. Recently I wondered what a tomato soup made just with these tomatoes would taste like. The tomatoes are so good, I keep a bowl on the counter just for a snack. 

And so I began, tomatoes, onion and garlic...

Chop the onions and garlic. Saute the onions in a tablespoon of olive oil until they are tender, then add the garlic and cook for just a minute more. You don't want the onion or garlic to brown, just soften. Season with salt, pepper and thyme. If you have fresh thyme, cut some stems, tie them together with kitchen twine and throw the bunch into the pot. Dried thyme works too, add it before you add the tomatoes, let it cook 1 minute.

Add the tomatoes to the pot.

Cover, turn the heat down to a simmer, cover and cook until the tomatoes have burst, and cooked down. When the tomatoes are cooked, after about 45 minutes or so, turn the heat off and let the tomato mixture cook slightly. Process portions of the tomatoes in a blender or a food mill if you have one. The blender grinds up the tomato skins almost completely. 

Next pour the blender processed soup through a wire mess sieve to get a smooth soup without seeds or bits of skin. If you used a food mill, it will trap the seeds and skin as the soup is ground.

This has a very different flavor than the red tomato soup and is a great way to use up the massive number of tomatoes that the Sun Gold plants produce! If you just can't manage to eat it all as you make it, just freeze for a delicious winter treat and tasty memory of those great summer flavors!

Had some for lunch today...YUMMY!


Thursday, July 24, 2014

Easy coconut cookies

There are lots of different ways to make cocadas, or coconut cookies. This is really easy. All you need is a 14 oz. bag of shredded coconut, a 14 oz. can of sweetened condensed milk and a lime.


Pour the shredded coconut in a large mixing bowl. Add the zest of a lime.


Use the juice from the whole lime.


I used the whole 14 oz can of condensed milk. It creates a thick mixture, but isn't dry.


Mix the ingredients. Use an ice cream scoop or two spoons to create mounds of the coconut mixture so that they are all the same size.

Place the mounds on a pan lined with parchment paper. Using a 1.75 inch scoop, I created 21 cocadas.


Bake at 350 degrees F. for 15 - 18 minutes. Watch them so that they don't get too brown. The bottoms will caramelize and the cookie will be soft and chewy. Let them cool completely before eating.

I turned one over so you could see how it will caramelize, yummy!


Hope you enjoy baking these!


Monday, July 14, 2014

Spent Grain Bread from beer 'left-overs'

If you like a hearty, nutty whole grain bread, you need to try making bread using the spent grains from brewing beer. Local breweries will give you the spent grains which many use for farm animal feed or composting and bread making. Not having a farm, I will use my spent grains to experiment with bread recipes.

The first spent grains I used were from Jade, a beer produced at Foothills Brewery in Winston-Salem, North Carolina.

I dried the grain in the oven at 170 F and ground it up a bit in the food processor. It doesn't quite grind down to a flour consistency, but makes a fine grain which is great for the bread.

The recipe shows measurements in ounces and grams. A digital scale is useful for exact measurements.


 Then I make the spent grain bread.

Once the grains are dried and ground, they can be stored in the freezer for future batches. Tomas Rohner's directions for the spent grain sesame bread (see link above) are easy to follow and not technically difficult. It just takes time for the pre-ferment, 12-18 hours. The steps are shown using a bread machine, but I just mix in the Kitchen Aide and knead by hand.

Now I have another batch of spent grain from Natty Greene's Brewery in Greensboro, North Carolina. It is a pale ale spent grain. I also got a cup of the wort.


Doing a little research on the internet I found a recipe using the wet spent grain from the American Homebrewers Association and advice on substituting some wort for part of the water in the recipe. This was easy to mix in a large stainless steel bowl. I kneaded it, adding flour until it was no longer sticky, just a little tacky, and put it in the cleaned, oiled bowl and covered it to rise.


I made the bread a little differently using the second batch of bread from the Natty Greene's spent grain. Using the recipe from the American Homebrewers Association (see link in previous paragraph)
I used 1 cup of whole wheat flour in addition to almost 4 cups of bread flour and used honey instead of sugar. Just use 1 teaspoon of the honey to activate the yeast and put the rest in the bowl with the other ingredients. Instead of 3 cups of wet spent grain, I used 1 packed cup of wet spent grain that had been ground up in the food processor.  This wet spent grain recipe doesn't require a long preferment like the recipe from Rohner mentioned above. You can mix it in the morning and bake in the early afternoon.


The half sheet pan in the back has spent grain that has been dried in the oven, 170 degrees, stir it occasionally until it is dry and leave the oven door open slightly so that moisture can escape.


The loaf to the left has risen, been misted with water and slit with a serrated knife.


It has a light texture and browns nicely in the oven.


All ready for that tomato sandwich, it is summer after all!


Even if there isn't a brewery near you, so many people brew craft beer at home, it may be possible to find a local source for spent grain.

Happy Baking!


Tuesday, July 1, 2014

Snowy owls - another live cam

The snowy owls have a live animal cam too! Check out this Journey North link to see these owls and many more live animal cams! With 24 hours of daylight above the arctic circle there is lots of time to view them!